Showing posts with label Strobism. Show all posts

Sunday, 28 March 2010

Gellin' like Magellan

I've had a number of people over the past few weeks ask me about gelling speedlight flashes, and how I do it.  What gels do I carry around?  How do I attach them to my speedlights?  Are there any technical issues I need to think about? and so on.

Then today a thread was started on the Strobist Flickr group regarding the storage and organisation of gels and attaching them to the flash, so I was going to fire off a couple of pics.  Well, I ended up shooting more than a couple, and decided to finally write a bit of a blog post about it.

I will use the terms "gel" and "filter" interchangeably throughout this post, but please note that when I say "filter", I'm talking about gels for your flashes, not those that you screw onto the end of your lens. :)

So, to start with, I use Nikon SB-900, SB-600 and Yongnuo YN460-II flashes.  The SB-900 comes with its own gel holder, and a small selection of common gels which work well if you  happen to need exactly those gels, but sometimes you don't (although there is the Nikon SJ-3 filter kit available for the SB-900 to give you a little more variety).

In the image above, you can see the three models of flashes mentioned, as well as my "gel folder".  It's actually a business card holder, but it works perfectly.  In the front of the folder is a pouch containing my four Lumiquest FXtra gel holders.  Beyond that are pages of gels, ordered in different strengths, grouped according to colour.

On the first page of gels, you can see double CTO at the top, then full CTO, then 1/2 CTO and 1/4 CTO.  The slip with information from the Rosco swatchbook is contained in the same pocket, and each gel has an address label attached to the end for quick and easy organisation when packing things away.


Above you can see a selection of CTO, CTB and Neutral Density filters that I pop over the flashes. Why neutral density filters? Well, sometimes, lowest power just isn't low enough, especially if you're working in close quarters with really tiny subjects.

To attach these gels to my flash, as mentioned, I use the Lumiquest FXtra gel holders. They can seem a little pricey, but I believe they are definitely worth it. It makes adding, removing or switching gels an absolute breeze, and using the cinch straps, there's no bits of velcro glued to your flashes and no sticky residue to deal with when they fall off.

Here are the Nikon SB-600, SB-900 and Yongnuo YN460-II flashes with the Lumiquest FXtra gel holders attached. The image on the left shows the coverage over the front of the flash, and the image on the right shows the potential for light leakage on the sides.


As you can see, the FXtra's opening completely covers the flash head of both the SB-600 and the YN460-II when viewed from the front, which makes them idea for flashes with a head this size.  It is a little tight on the SB-900, and the gel holder itself doesn't cover the full width of the flash, but not enough that it's ever bothered me.  You can see on the image on the right, that the YN460-II gets the closest to the flash head for less leakage potential, although its head is fixed at 35mm, whereas the SB-600 and SB-900 can zoom their head for longer reach and less risk of spill.

Again, light spill out the sides from these has never really bothered me, and I can't really say it's affected my images, however thoes gaps at the side can easily be covered by a bit of black gaffer tape.

A couple of things to note when using it with an SB-900.  Firstly, as mentioned, the FXtra doesn't cover the full width of the SB-900 flash head.  This, in and of itself, is not a huge problem, as the gels are wide enough to cover the entire head.  The other thing is that you've picked your gels out of a swatch book, they will have holes in them.  You will need to either cover these up, or source gels that do not contain holes, such as those found in the strobist collection.
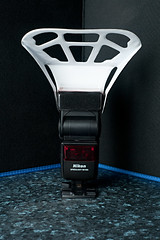
There is another reason I chose to go with the FXtra gel holders, and that is as well as having velcro on the inside for attaching the holder to your flash, it also has velcro on the outside too, meaning you can attach further light modifiers.  This makes it very handy if you need to use a flash on-camera with a gel, but still wish to use something like a Lumiquest 80/20 bouncer, a snoot, or a small honeycomb grid.

This light modifier allows 80% of your flash's output to continue straight on to bounce of a ceiling or a wall or whatever, while 20% of the light hits the bouncer and is directed at your subject in a slightly diffused manner.  This essentially allows your flash to be its own key and fill light, although with varying degrees of success depending on your surroundings.  It's not really all that cheap considering what it is, but it's something I wouldn't be without in my bag for those times when it's really needed.

So, that's a little more on the how, and what I use to attach flashes to my speedlights, and a bit of why I chose to go the particular route I went - essentially speed of use and the ability to add extra modifiers over the top of the FXtra.

I'll post a little more about why you would actually need to use gels (and why you might want to even when you don't need to) at some point in the future.

Monday, 22 March 2010

A couple of videos today

I've been quite slack in posting this month due to getting out a bit more and actually doing some shoots, then the inevitable post-processing  that comes afterwards, so I do apologise for neglecting you all.  I do, however, have all the models' choices processed from the Manchester shoot now, so I'll hopefully have enough time free to get those posted in the next couple of days.

I did make a little video the other day though demonstrating the use of a Nikon SB-600 as a repeating flash slave using the Nikon CLS system with a hotshoed SB-900 as the commander - somebody posted on a forum that this couldn't be done, so I had to prove them otherwise.


The whole repeating flash thing has me intrigued, so I'll be doing various test with SB-900, SB-600, Yongnuo YN460-II flashes, using the CLS system, standard optical slave modes and wireless triggers to see exactly what will and won't work, and the degree of reliability with each.  I'll be doing a few experiments with different ideas and setups, so I'll post details on those as I get through them.

The other video I'm posting isn't one of mine.  Zack Arias did a very inspirational and informational talk a few days ago at PhotoCamp Utah 2010, with a lot of GREAT tips and advice.


There are also plenty of other videos from the event on their Ustream channel, so head on over and have a watch.

Monday, 15 March 2010

Liverpool Group Shoot

So, I made it through another group shoot, this time at VIP Studios in Liverpool.  Another excellent day, and loads of fun with some very cool people.  We all spent the day rushed off our feet, and everybody had such a great (and tiring) day.

It's not often I shoot in a studio (well, not for stills anyway), so I spent a bit of time playing around with beauty dishes, smoke machine and other gear I don't normally use.  Didn't get quite as much time playing with them as I would've liked (well, it was a group shoot, and everybody had to have a go), but it was still a very enjoyable time.

I know I've still not posted up any new pics from the Manchester shoot, but the models are still getting back to me on which they'd like me to edit for their portfolios.  Once they've all chosen, I'll post the finished works on here (although some are already up on my Flickr).

The only image I've really worked on from the Liverpool shoot so far is the one at the top right of this post.  As soon as I saw the frame I had to give this a go, and Marie was such a star reproducing several poses with and without clothes to try to get matching images.  It probably would've been more effective with a smaller frame, so next time we get the chance to shoot together again, we're going to be trying with a smaller frame, perhaps even several frames to make things a little more tricky. :)

A big thank you to Sabrina Atkinson, our MUA/Stylist for the day, she did a fabulous job, and didn't stop all day.  Also a big thank you to Marie, Raj, Ophelia, Kit and Keely, our models, you were all great, and thank you to all the other photographers for showing up and making it a great day for all.

Tuesday, 2 March 2010

Great day at the Victoria Baths in Manchester

So, Sunday's shoot was great, got to work with some fantastic people (Hi Annmarie, Jade, Jo, Emma, Keighley, Cindy, Sarah, Steve, Jonathan and everybody else I've failed to mention!) during the group shoot organised by TFPModels at the Victoria Baths in Manchester.

Had an absolute blast but was a very very exhausting day, and the temperatures really didn't help, but everybody was so nice and such great fun.  The models were all superstars, braving the cold and struggling to get poses in between big iron pipes, holes in walls and other crazy spots.


I'll be posting up more of the photos as I make my way through them, but here's a few images of the lovely Cindy to tide you over.  It did get awfully cold in those tunnels, and while not officially a part of the outfit, I couldn't resist getting a couple of shots in that big warm coat. :)


Cindy was a pleasure to shoot, and hopefully we'll get the chance to work together again real soon.

Oh, while I've got you here, saw this today, gave me a good chuckle. :)

Saturday, 20 February 2010

Yongnuo YN460-II Quick Review

So, my other order came in today, which included a pair of Yongnuo YN460-II flashes, 2 more RF-602 Tx/Rx kits with Nikon cables, and a couple more RF-602 receivers, bringing the total up to 3 transmitters and 7 receivers now, which should be plenty for the various tests I have planned.

I had a quick play with them earlier today just to see how well they'd work out for the whole repeating flash thing, and while not entirely reliable for fast stroboscopic stuff as an optical slave, they didn't work too badly.  Their power output is quite nice, and they're slightly larger in size than the Nikon SB-600 flash (as you'll be able to see from the images a bit lower down the page).

The thing that rather surprised be about the flashes, when I read about it, is that they were "sort of" compatible with the Nikon CLS system.  No, you cannot control them via a CLS commander, however they have a second optical slave mode which completely ignores the CLS pre-flashes and only triggers on the main exposure, making them ideal for something like background lights or to light up a Hilite or something, while still retaining full iTTL control on the subject via Nikon SB-900s.

The infrared trigger for use as an optical slave has been moved since the YN460.  It now resides behind a little red plastic cover on the front of the base of the unit.  The flash head will rotate vertically from -7 to 90°, clockwise 90°, and anti-clockwise all the way to 180° (the same as the Nikon SB-600), so having the body of the flash pointing at another light source while the head points at your subject (or whever you need it to) should rarely be a problem.

There is no "locking system" to hold the flash head at any position, but you do get rather satisfying clicks at various points while rotating the head to different angles.  I'm not so sure about the locking wheel on the foot yet, but I'm sure I'll get used to it.  Perhaps I'm just too spoiled with Nikon's quick-release flash feet.

Again, the build quality of these extremely inexpensive flashes has impressed me.  They feel pretty solid in the hands, although the cover for the battery compartment see,s require a little persuasion to click shut properly without the risk of breakage.

The controls on the back, while fairly primitive when compared to something like the SB-900, are straightforward and to the point.  There is an on-off button, which has to be held down for several seconds before the unit actually turns on or off, although unlike the Nikon SB-600, it sits proud of the interface and could possibly be depressed for a long enough period of time to turn it on while in transport.  Fortunately, when in "M" mode (the default when you turn it on) the flash automatically goes into sleep mode after about 3 minutes of non-use, and turns itself off completely after 30 minutes, but it's still probably a good idea to remove your batteries immediately before packing up to travel.  In S1 & S2 modes, it automatically powers down after 60 minutes of inactivity.

The "Pilot" button gives you a quick flash trigger.  The "Mode" button allows you to switch between standard manual flash mode, S1 and S2 modes.  S1 is your bog standard optical slave mode; when it sees another flash, it triggers.  S2 is the pre-flash-ignoring optical slave mode.  This is the one that allows you to add the YN460-II to a CLS setup (in a limited fashion, obviously).

The power buttons allow you to go from 1/64th to the full power of the flash, which has a GN of 38 @ 35mm & ISO100.  These settings can also be fine tuned in 1/7th of a stop increments for a total of 46 different output levels.

So, another result for Yongnuo as far as I'm concerned.  Between these and the RF-602 gear, I'm very happy.  I wonder if they'll ever produce a flash that has the RF-602 receiver built in?  Oh, and a 3.5mm sync port would be handy too (and I'm sure David Hobby would agree with me). :)

Wednesday, 17 February 2010

It goes from bad to worse, then better again! :)

So, after spending a couple of weeks in bed recovering from surgery, then heading down to Birmingham for the Spring Fair, I get back home to find myself spending another week sick in bed.  After talking to a few other people that went it seems their must've been something going around at the show.  Now, though, I'm finally starting to feel human again so just wanted to post a quick update.

Had some new bits arrive this week.  My free SB-900 arrived yesterday from Nikon.  For those of you who didn't know, this was a special offer Nikon had for registered DSLR owners to upgrade to a D300s before mid-January and receive a free SB-900.  So, I did, and now it's arrived to join the ranks in my growing little Speedlight army.

Just as an aside on the flash situation, I just recently discovered that the Yongnuo YN460-II actually has some limited CLS support (sort of).  I always knew this flash had an optical slave mode (manual power, set from the flash itself, as usual), but what I didn't realise is that it has a second optical slave mode which is designed to ignore the pre-flashes sent by the CLS system.  Very very handy if you just want to add a little light to a dark corner in your scene and you don't quite have enough SB-900s to go around.  Just set your power (manually, from the flash itself, not via the CLS menus), pop on a gel, snoot, grid or whatever, and set it to CLS slave mode.

How close the colour temperature is to SB-900s (or even if their quality control provides for consistency between different samples of YN460-II flashes) I don't know, but at only £38 each, I think I'm going to have to pick a couple up and see how well they work.

Anyway, to go along with the new SB-900 and the RF-602 gear I received last week, I decided to pick up some Konig light stands.  I had bought some on Amazon a couple of weeks ago, but they turned out not to be anything like Konigs with a non-standard adapter nobody I know has ever seen before (although the image in the listing did clearly show a standard 5/8" spigot).  The company failed to acknowledge that the image misrepresented the item, but did refund the purchase cost minus the shipping (I had paid extra for next day), and my return shipping costs.  So, all in all, I'm out about £20 because of those idiots.

A friend suggested an alternative seller on eBay from which he'd purchased some in the past, and they were top notch, so I ordered four.  Konig, 2 metres tall (that's 6'6" for the rest of us), each with their own individiual bag.  Very pleased.  I hadn't tried them before, but I needed something a bit more lightweight than I usually cart around.

They'll definitely require some assistance to help prevent them from falling over in anything more than a breeze, and I probably wouldn't want to throw a 43" brolly on one outdoors, but they're not bad at all for the price and will definitely see much use now that the weather's starting to warm up.  Given that I got these to help become more "lightweight", I'm currently seeking alternatives to sandbags.  That kind of defeats the purpose of lighter stands, but we'll see. :)

Speaking of the weather warming up, and getting over spending far too long in bed doing nothing, I'll hopefully be able to get back out and shooting more regularly again soon.  So, I'll be popping up some reviews of the new gadgets I've picked up over the past few weeks, giving them a good workout and testing, along with some tips and tricks to workaround any problems that may come up when using them.

Saturday, 13 February 2010

Breaking out of CLS - First Impressions

Don't get me wrong, after struggling with SB-50DX flashes as optical slaves back on my old Nikon D100, I absolutely love the Nikon Creating Lighting System (CLS).  Now I can control all my flashes without ever moving my position, or putting down the wonderous chunk of plastic, metal, glass & silicon cradled in my hands.  It's a lazy photographer's dream. :)

But, CLS does have its limitations.  The biggy being that light (which is a pretty fundamental requirement for CLS) doesn't travel all too well through opaque objects.  If you're shooting an interior, for example, and you want to put a flash outside firing through a window, things can start to get pretty tricky if you want to also trigger flashes inside the room too.  Or, a little simpler, you just want to throw an extra flash behind a couch or under a table to light up the wall behind it a bit.  CLS isn't the ideal solution for these sorts of problems.

So, I finally decided to invest in some wireless radio triggers.  I say invest, but they weren't that expensive.  I'm far too cheap to fork over for PocketWizards just yet, especially as they're still slacking on the Nikon TTL compatible jobbies.

I went for the Yong Nuo RF602 transmitter & receiver (which you may see me refer to throughout the rest of this post as Tx and Rx for the sake of brevity) kit and a couple of extra receivers, which were extremely inexpensive.  The kit, comprising a transmitter, receiver, sync cord and Nikon 10-pin cord, was a mere £28.  Two extra receivers cost me £17.50 each for a grand total of only £63.  Seemed like an absolute bargain to me, a little over a quarter the price of a single PocketWizard transceiver.

As well as the obvious lighting solutions radio that wireless triggers bring, I had another motive for going with this system.  I wanted something that would allow my D200 to fire and take a shot every time I pressed the shutter button on my D300s (I'll explain the how and why of all that lot in another post after I do a bit more research), but so far my tests are showing positive results.

I have to say that I have absolutely zero prior experience with wireless radio triggers for flash.  After reading reviews of intermittent faults with some of the eBay triggers, as well as having to rely on mail systems in the UK and Hong Kong to sort out replacements should something break, I decided to just save up and eventually get some PocketWizards, but then these came along, and from a decent supplier already in the UK too (Scotland, to be precise).

Immediately upon opening the packaging, I was quite struck by how good they look, and how solid they felt; far beyond the quality I had expected.  So, first visual impressions are good.  There was a CR2 battery and a pair of random generic AAA batteries included with the Tx/Rx kit, but no extra batteries with the extra individual receivers.  So, I popped the supplied CR2 into the Tx, and tore open a big pack of Duracell Ultra AAA batteries for the receivers.

The transmitter is pretty basic; trigger button on top with hotshoe and channel selection switches underneath.  There's also a sync socket and an LED on the front indicating transmitter status (green for half-pressed, red for fully pressed).

The receivers have a very solid on/off switch with "ON" written in big letters so there's no confusion as to which way is which, an LED that changes colour depending on the state, and blinks while idle when the system is turned on (just to let you know you've forgotten to turn it off).  The top also contains a hotshoe mount for sliding in your flash, as well as the same channel selection switches as on the Tx.  On the bottom there is a plastic coldshoe for mounting on your brolly adapter or, in the case of the remote camera trigger, your camera's hotshoe mount.  Finally, on the back of the receiver is a 3 pin socket into which you can connect one of various cables for triggering flashes or a camera body (my particular kit came with a sync cable and a 10-Pin Nikon cable, but this may vary, so check which cables your kit comes with before you order).

As mentioned above, one of my reasons for getting these (actually, the main one at the time) was to trigger one camera with another.  So that was my first test.  Initially I hooked up an Rx to the 10-pin port of the Nikon D200 using the supplied cable, and just used the button on the Tx manually.  Half-press, AF light comes on, lens whirs into action.  Full press and the shot is taken, so far so good.

For my next test I put the D200 into full manual mode, 1/250th, f/4, ISO200 with the lens also preset in manual focus mode (the 50mm f/1.8D if anybody's curious).  Then I popped the transmitter into the hotshoe of the D300s.  Half-pressing the shutter release on the D300s body lit up the Tx's LED green to indicate its current half-pressed status, and the LCD on the D200 also indicated that it was in half-press mode by showing me the number of free image slots remaining in the buffer.  Firing the D300s trigger all the way triggered the D200.  Success!

I don't want to get too much into the whole multi-camera thing at the moment, as I said earlier, as I want to do some more testing an research.  In fact, my testing so far is so limited, I don't really want to get into too much of anything other than first impressions and detailing my quick trials of the system.  This was a very brief playing around.  I'll post more on them as I get to use them and really put them through their paces.

Now it's time to test the flashes though. So, Tx on the D300s hotshoe, two SB-900 flashes and an SB-600, each on their own receiver, and fire the shutter.  All three went off, although they were all only about 15ft from the transmitter.  Fire a few more shots, no misfires, still happy.

Now time to do a quick rapid fire test.  D300s, MB-D10 grip, 8xAA batteries, 1/250th of a second, f/4, ISO200 @ 7.7fps.  Held the button down long enough to get about 20 shots, the flashes fired flawlessly every time, not a misfire.  Tried that again a couple more times, again, still not a single misfire.

Just as a sidenote, I use GP 2700mAh AA rechargeable batteries in my MB-D10 grip and Speedlights.  I've always found them to be the most solid and reliable rechargeable AAs, and they've not let me down yet (and they fully charge in only 15 minutes).  I've just ordered some GP 1000mAh rechargeable AAA batteries for the receivers too, so those should be here in a couple of days.

That's pretty much it at the moment.  I did warn you that it was pretty limited testing.  I found that they had been delivered late on Thursday night when I'd arrived home from the Spring Fair at Birmingham, so I was already half asleep when I walked through the door.  Since then I've just been too exhausted/lazy/busy to get them out and really put them through their paces.

I am quite chuffed with these at the moment though, and they seem to work quite well.  I will be getting another Tx/Rx set and a couple more receivers to do some better testing, and to have backups handy, so once I get them and do that testing I'll be updating the blog.

Do be warned that you should remove the CR2 from the Tx after use.  The button on it is kind of sensitive to a half-press (and is essentially the only "on/off switch"), so it can drain the batteries if it gets depressed while being carted around in your camera bag.

Sunday, 24 January 2010

Photo 52 Week 3, "Chopped"

You can see the image I posted for this week's Talk Photography Photo 52 by clicking on the image to the right, but I wanted to post a little extra about it here on my regular blog, mention how I messed up, and how I could've fixed it had I enough time.

The theme this week was "Chopped", which sent quite a few ideas through my mind, most of which required a decent amount of effort to try to avoid the obvious, but I had settled on one specific image in my head.  This wasn't it. :)

My own kitchen is currently a construction site, so I decided to head over to my mother's house to take the shot.  The other reason was that I knew (or thought) she had some props there that I had in mind for the original image I wanted to make.  As it turned out, she didn't. So, I had to come up with something else and shoot it in about 10 minutes, as she was rushing me to get out of the house as she had to leave (and I'd lose my assistant holding the light too).

So, this is what I came up with.  I do like the composition and layout of it, for the most part, but the lighting definitely needs some work.  This is primarily where I screwed up.

I wanted to use a traditional wooden handled axe, but after trips to four or five different local hardware stores I couldn't find a single one that was about the size I needed.  The only wooden handled ones I saw were absolutely massive, and far too big for my mother's kitchen counter (which, as you can see from the image, just wasn't quite deep enough for what I was going for as it was).

The scene was light by just a single SB-900 from above camera right, shot through a 33" TriGrip diffuser.  If I'd had the time, I would've added a second snooted or gridded SB-900 above at the far side of the axe (flagged off from the camera to help prevent flares) pointed at the axe head in order to give it some reflection and show off a bit more of its curved shape and definition.

I might also have possibly put another snooted SB-900 camera left on the countertop throwing a very small amount of light on the back face of the axe head to help separate it a bit from the dark shadow of the countertop.

I do have a couple of other ideas for the "Chopped" theme, but there just wasn't enough time to shoot them when I did this (like I said, I didn't even have enough time to get this one right), so this is a subject I want to go back to in the future to try those out, as well as revisit this particular shot and fix the lighting.

You can follow the progress of my Photo 52 over on my Photo 52 Blog.

Friday, 22 January 2010

What's in the bag? - My Strobist Kit

One thing people always seem to want to know is what's in another photographer's kit bag, especially these days when it's of the strobist variety.  Being a Nikon strobist, I'm often asked what I take out with me on a typical job when I'm using speedlights, but there really is no typical job in my experience.

Short of taking everything, which kind of defeats the purpose of traveling light and using small strobes, there's no way that I would be able to put together a one-size-fits-all set of gear.  Sometimes I may only need a single SB-900, other times I may need a dozen.  I might only need a single lens for the whole shoot or I may require 2 or 3.  I may or may not require softboxes, light stands, background stands & backdrop, snoots, grids, gels & holders, flash brackets, clamps, laptop & USB hard drives for tethered shooting, or any one of a hundred other things.

That is not to say that I don't always have a bag prepared and ready to go should the urgent need arise, and that's where this post comes in.

I have a few different bags that I use, but the one I carry most often is my Tamrac Cyberpack 6.  I bought this bag about 5 years ago and love it.  It's got plenty of space in there, and feels fairly solid on my shoulders when carrying it around.  Fully laden it can get very heavy, so I tend not to fill it whenever possible, especially if walking long distances during the course of a location shoot.  It has a laptop pouch in the back of it that I rarely fill unless absolutely required for this reason.

But, to get to the list.  I find this generally covers many initial scouting requirements and will also suffice for quite a bit of basic shooting, enough to keep the clients happy.

Note : Some of the items in the list link to Nikon USA as they don't seem to appear on the Nikon UK website for some reason.
    Other Bits & Pieces
  • Manfrotto 3001BN tripod & 3030 3-way Head (Bought this a few years ago when they still marketed as Bogen) - I'm usually hand-held with flash, so I don't need anything overly heavy or stable; it's just to rest the camera on. When I am shooting from a tripod at a client's location, it's usually indoors with the Sigma 10-20mm and MC-20 remote so no wind or shake to contend with really anyway.
  • Hotshoe bubble level (Not really needed any more on the D300s, but still used on the D200)
  • Various Hoya & B+W UV & Polarising Filters
  • Nikon MC-20 10-Pin Remote Control
  • Nikon MC-21 10-Pin Extension Cable
  • A couple of Lastolite Tri-Grip reflectors & diffusers
  • A couple of Microfibre Lens Cleaning Cloths
  • A stack of business cards
That's essentially it, and somehow I manage to fit all that lot inside the Cyberpack 6 backpack (well, most of it).  I will generally also carry along the Nikon 70-200mm f/2.8 VR lens along in its own bag and just hang it over my shoulder (if it's not attached to a body at the time).  If I am taking the 70-200VR along, sometimes I'll remove the 300mm f/4 AF-S from the bag, so I can fit another SB-900 in there if needed.

This setup doesn't really account for any umbrellas, light stands, softboxes or environmental portraits, but it does the job nicely.  If I'm going straight to a business location, such as an office, with all the equipment and doing all the shooting there, I will usually pop the laptop into the back of the backpack so I can shoot tethered. Then I'll either take along a second bag containing light stands, flash brackets, umbrellas, reflectors, a couple of big white bedsheets to act as large diffusers, etc. or I'll just repack a single bag to suit the job.

So, there you have it.  That covers most of my arsenal of strobist lighting gear and other gadgets & doohickies.